This is my second time to write about trail orienteering (trail-O). For the basics of trail-O, please check my previous blog post. In a one-sentence summary, trail-O is a multiple-choice problem set that asks competitors which one of the multiple flags (or none) best describes a location on the map.
On April 29, 2017, there was a practice trail-O event in Kowloon Park (九龍公園). The purpose of the event was to promote trail-O, which is relatively new to Hong Kong in the history of orienteering. Although this was only my third time in doing trail-O, I like it a lot partly because trail-O focuses more on problem solving than physical running. To classify further, this trail-O is a precision trail orienteering (pre-O) event, meaning that most questions in this trail-O competition are not timed.
In this blog, I will cover all the controls in this competition. The emphasis will be on problem solving methods. A few technical terms will be defined as follows, since I will use them several times:
- Controls: checkpoints, or the center of red circles in the map. In trail-O, these controls are the ones that competitors need to identify out of several markers.
- Decision points (DPs): the location where competitors identify the designation of the marker choices (i.e. A, B, C, D). In this blog, the first picture for each control was taken at or close to the DP.
- Control descriptions (clue sheet): the 8-column boxes that describe the locations of controls, using IOF symbols. They will be translated in English below each clue in this post.
- Re-entrant (山窩): a large gully, or valley. A contour feature where elevation is concave in. The opposite of a re-entrant is a spur, which is convex out.
Here is the map for the trail-O event. All the answers will be at the end of this blog.

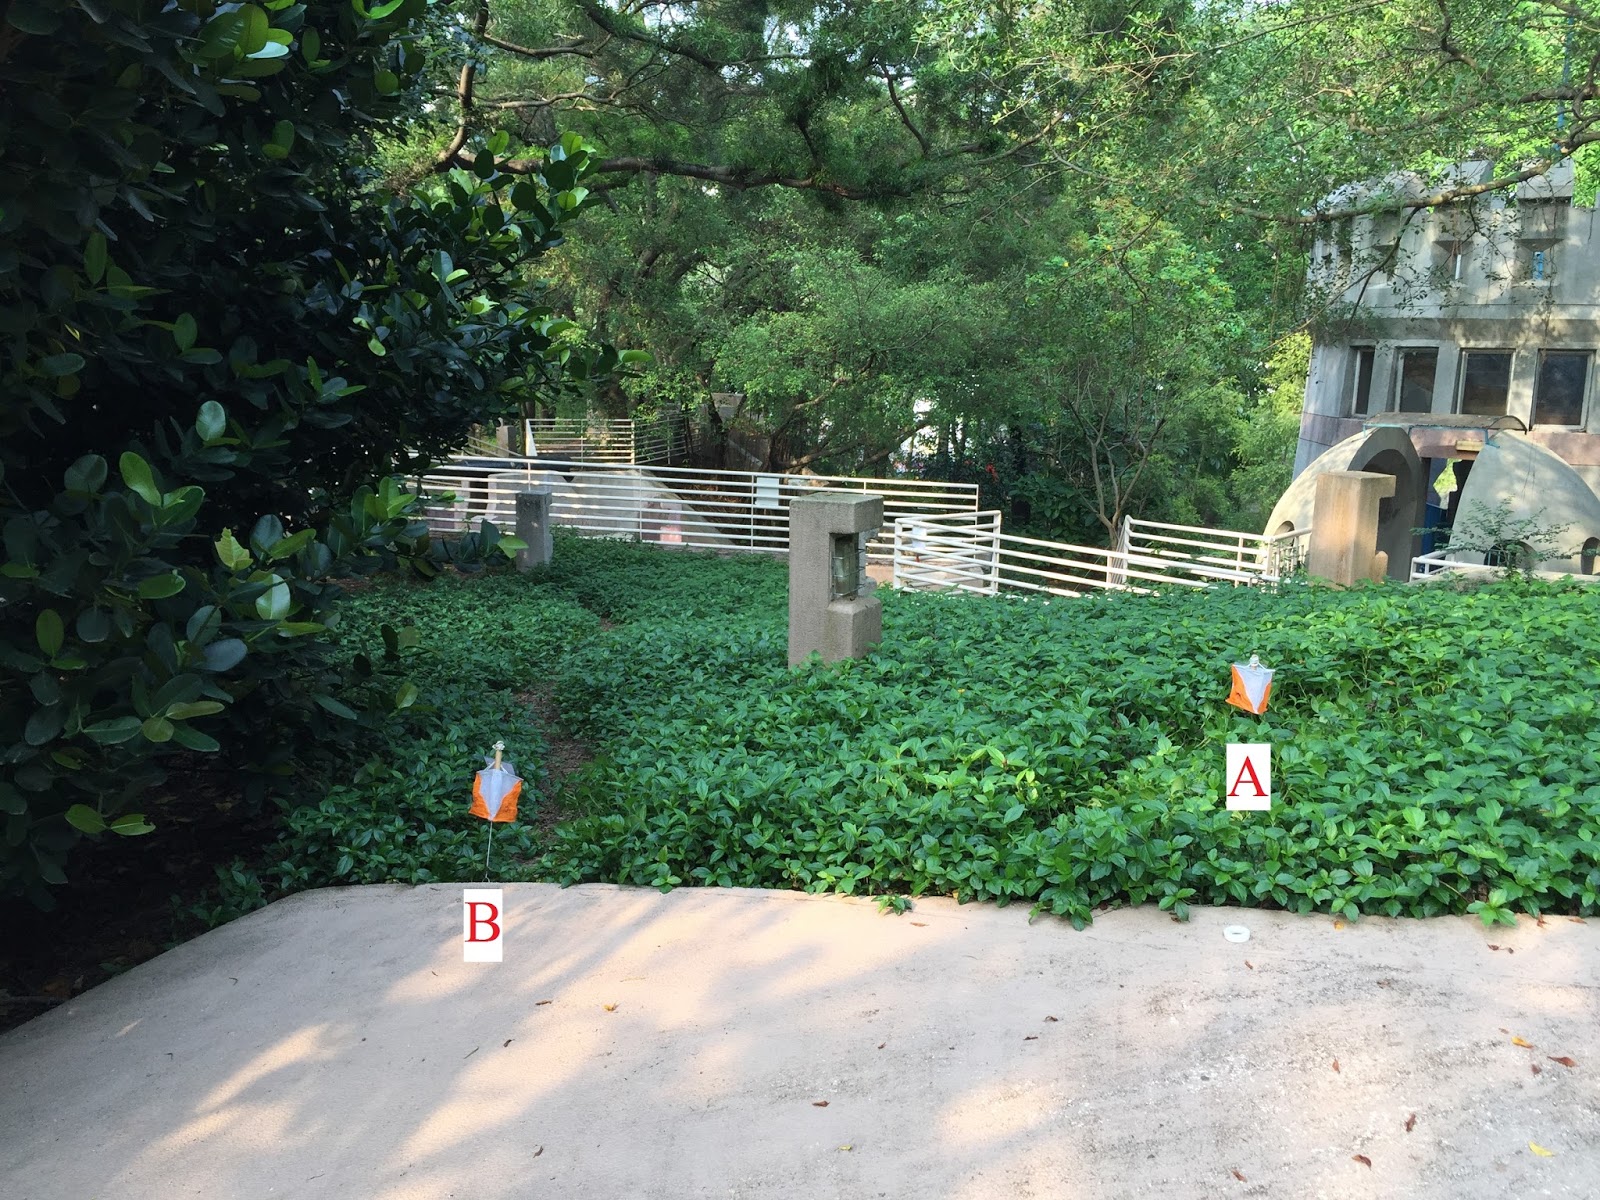
Control #1 and #2 -- Warm Up
Good to see the first 2 controls that could serve as a warm up for those who have not done trail-O before. In Control #1, there are two flags to choose:
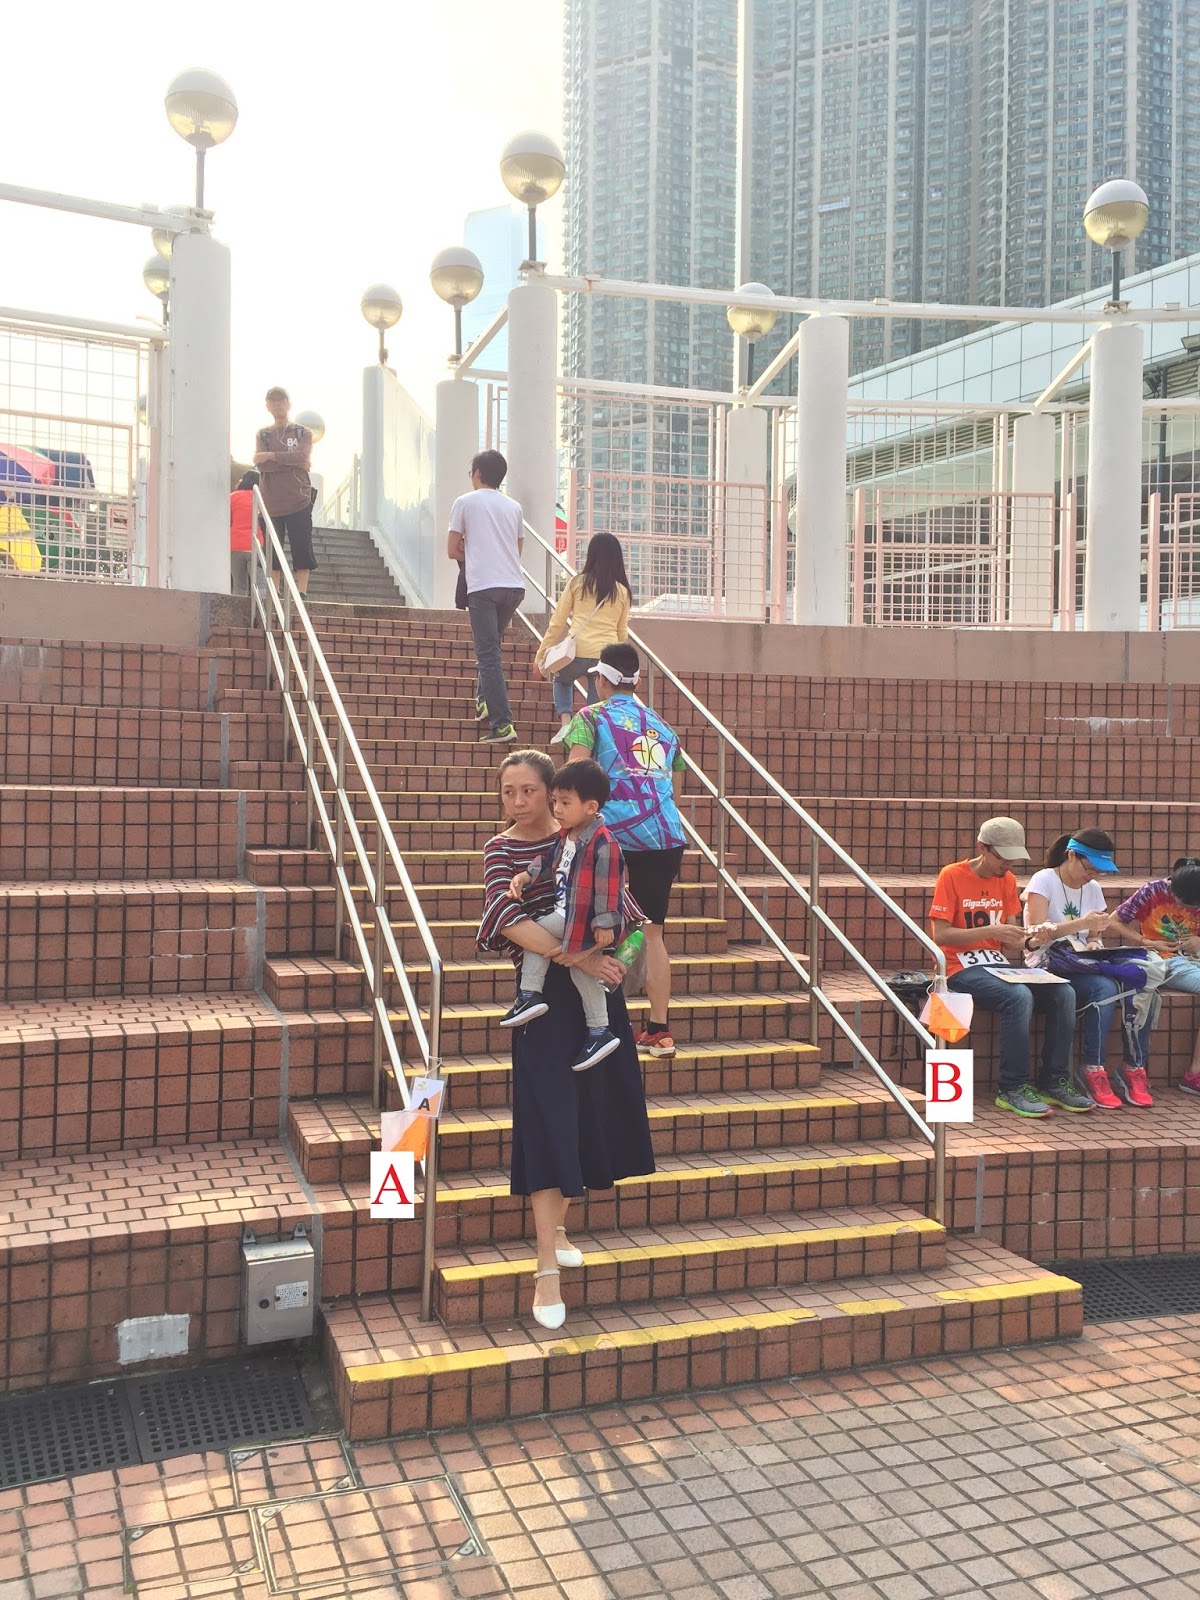
 |
| Purple arrow: photo taking location and direction |
| Control #1: 2 flags, the south fence, east end |
This control can be easily solved by reading the control description: it is the south fence. From the photo, one flag is on the north fence, and the other flag is on the south fence.
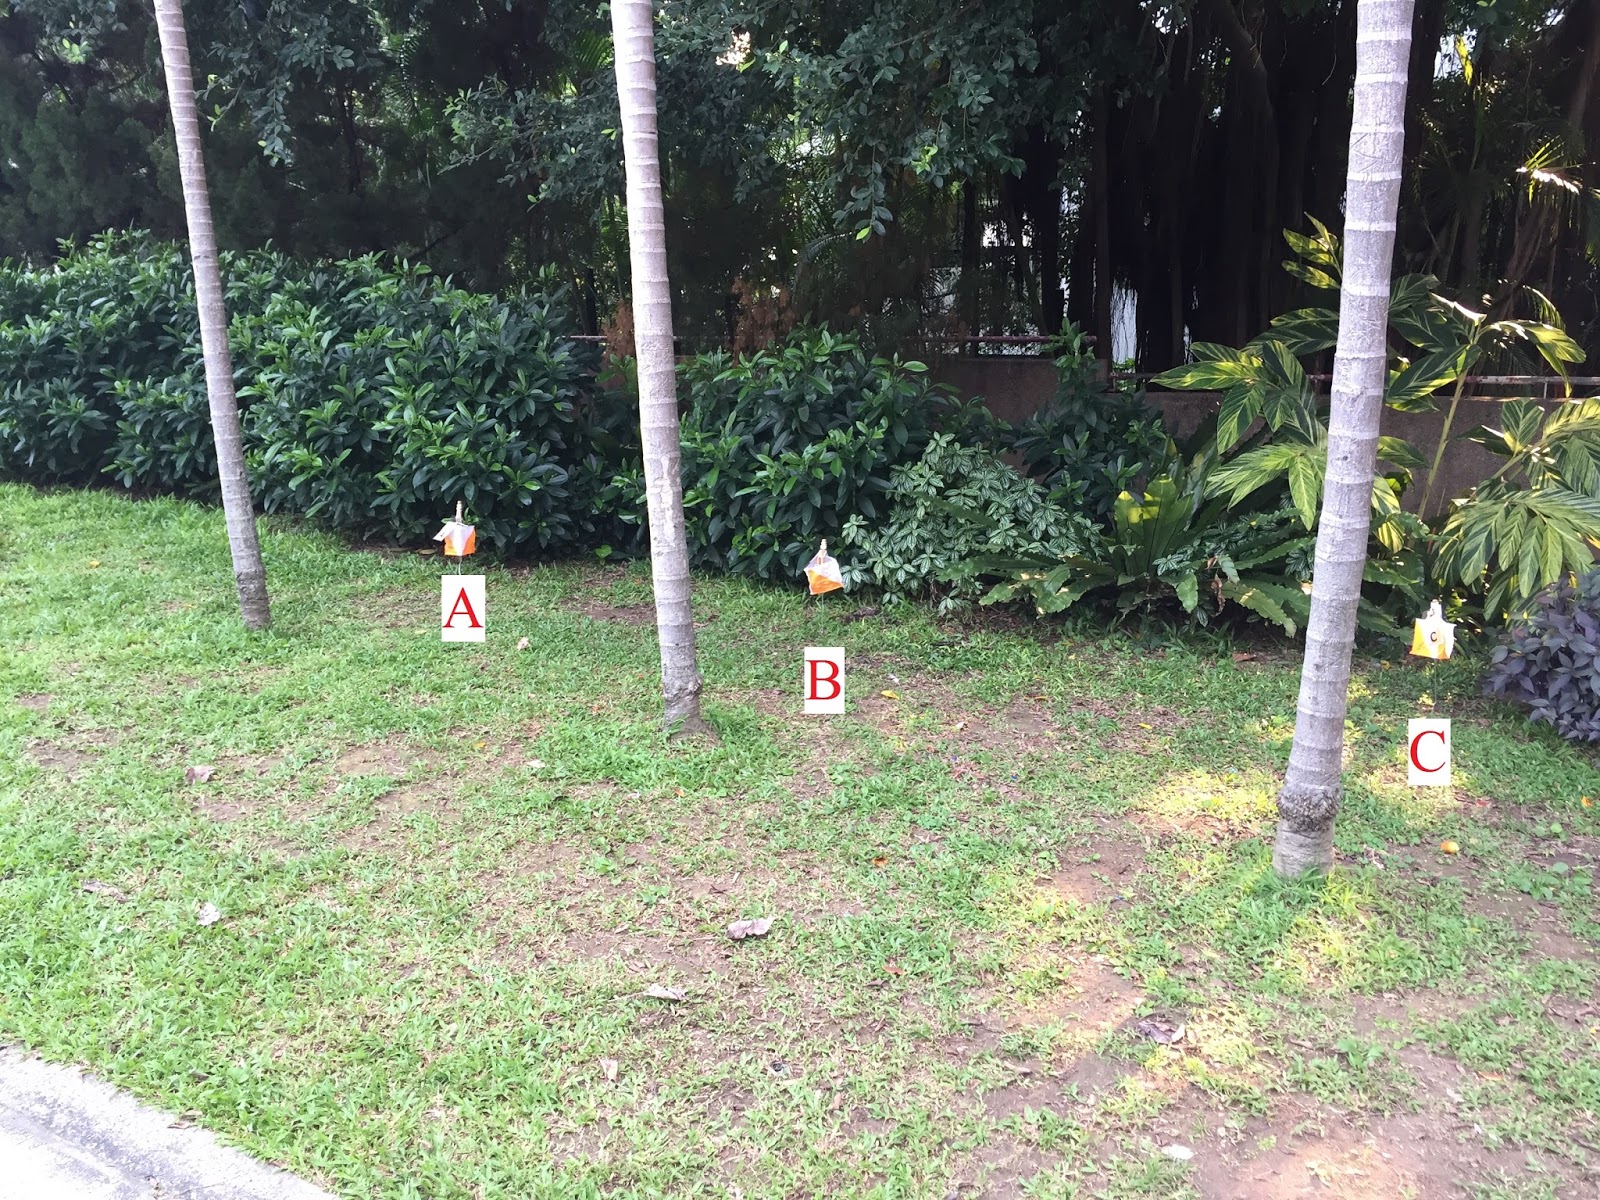
 |
| Purple arrow: photo taking location and direction |
| Control #2: 3 flags, thicket, NE corner (outside) |
Control #2 is also easy. The corner of the thicket can be seen easily. To verify the answer, one may also count the number of trees to this thicket corner.
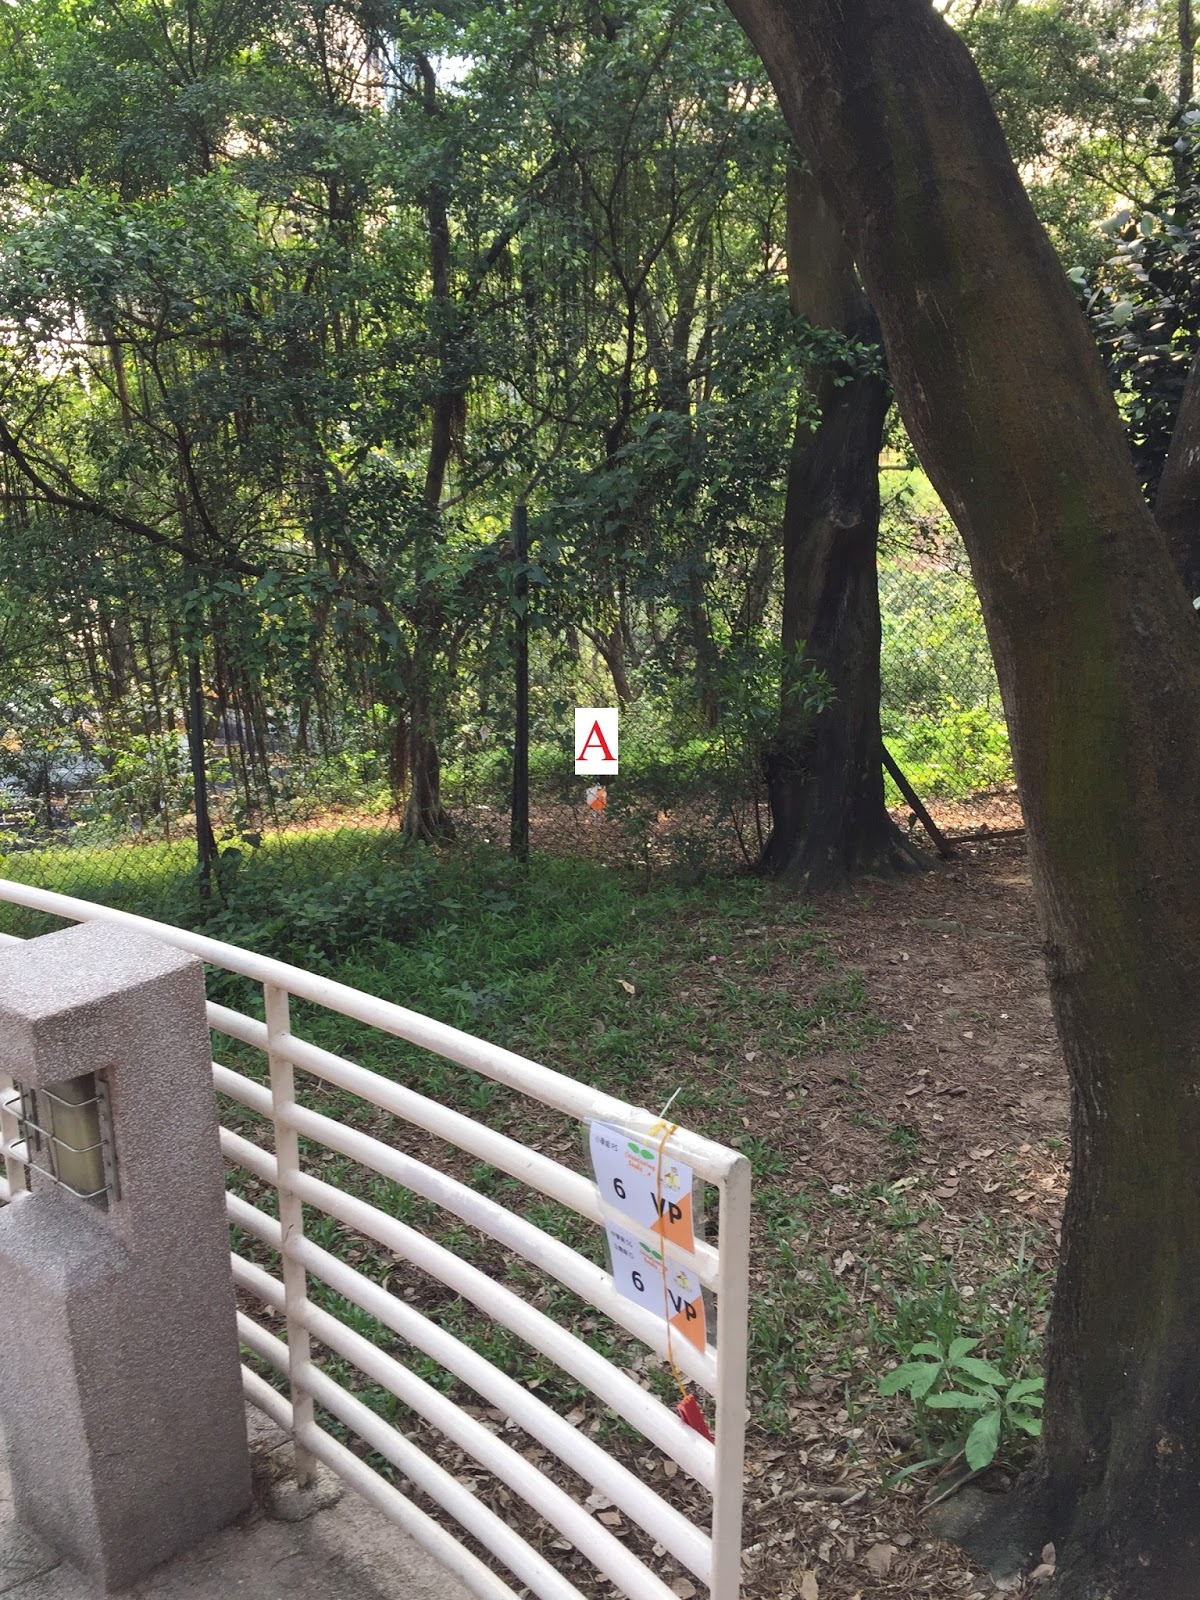
Control #3 and #4 -- Getting a Bit Challenging
The next two controls could be seen in the same DP. I separated flags A and B and flags C and D into two pictures, since A and B relate to Control #3, and C and D relate to Control #4.
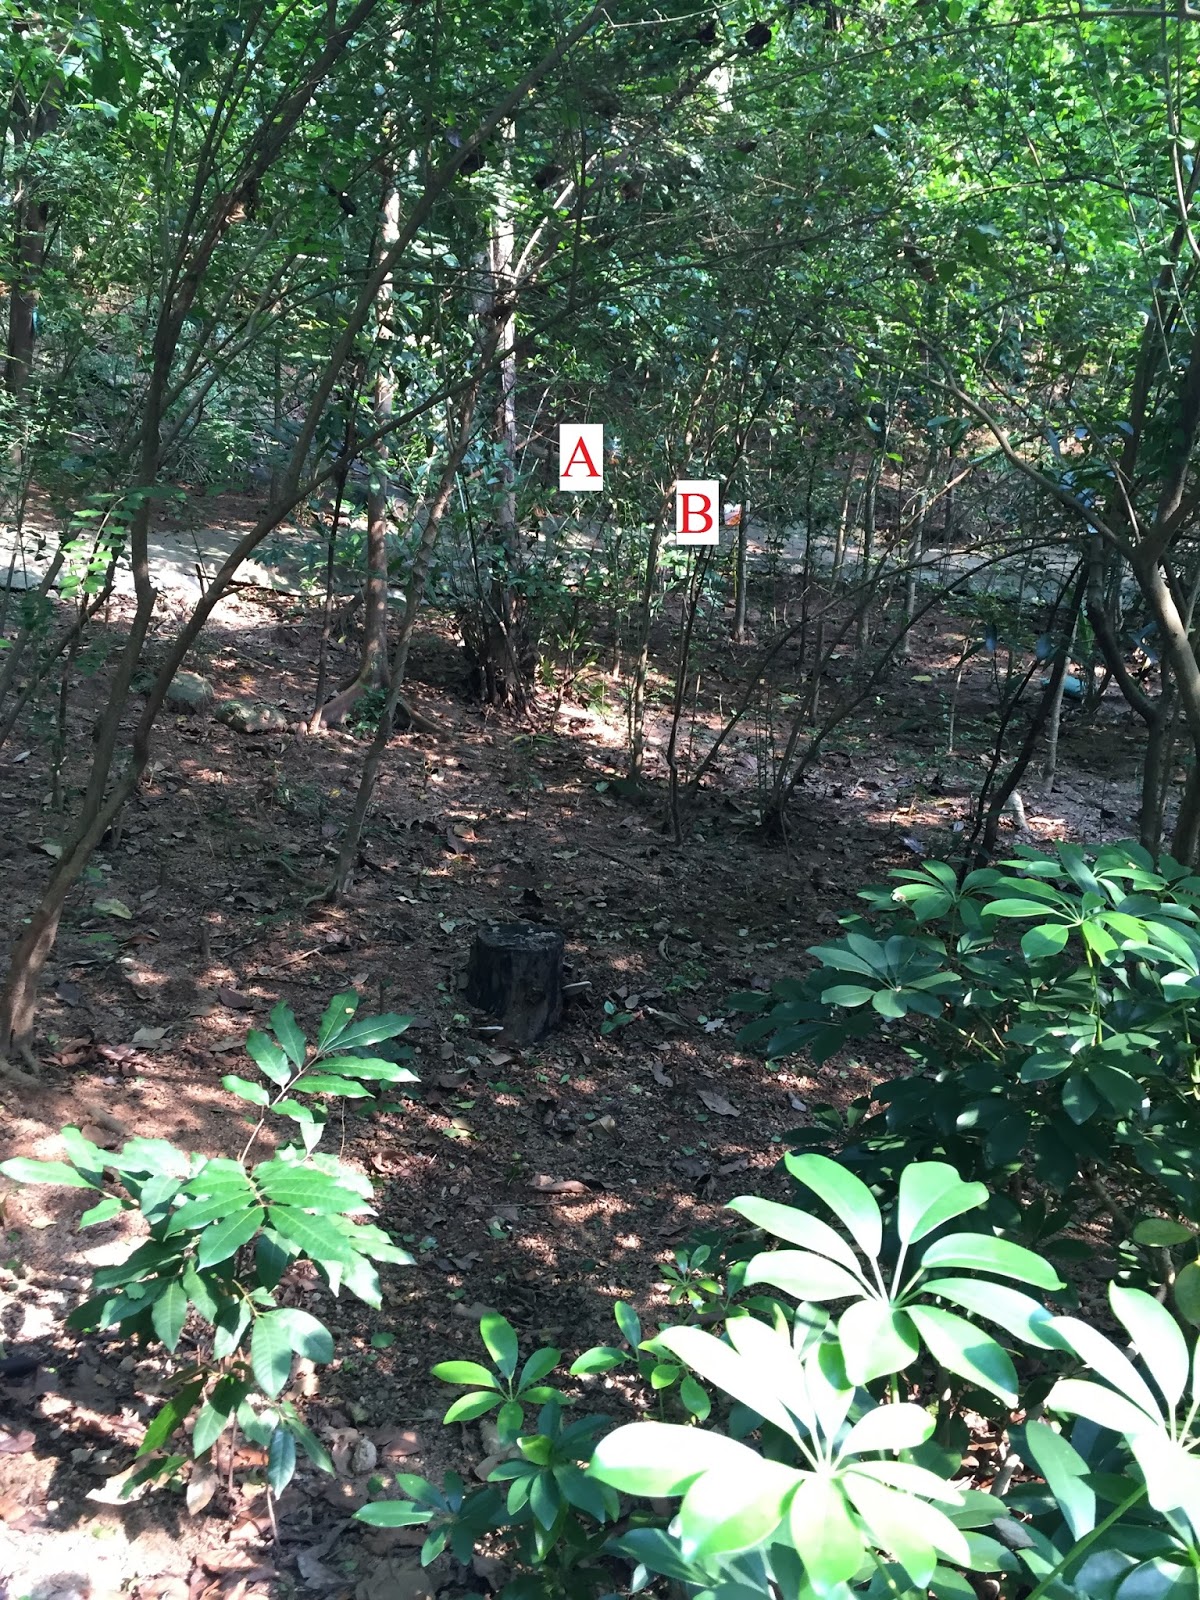
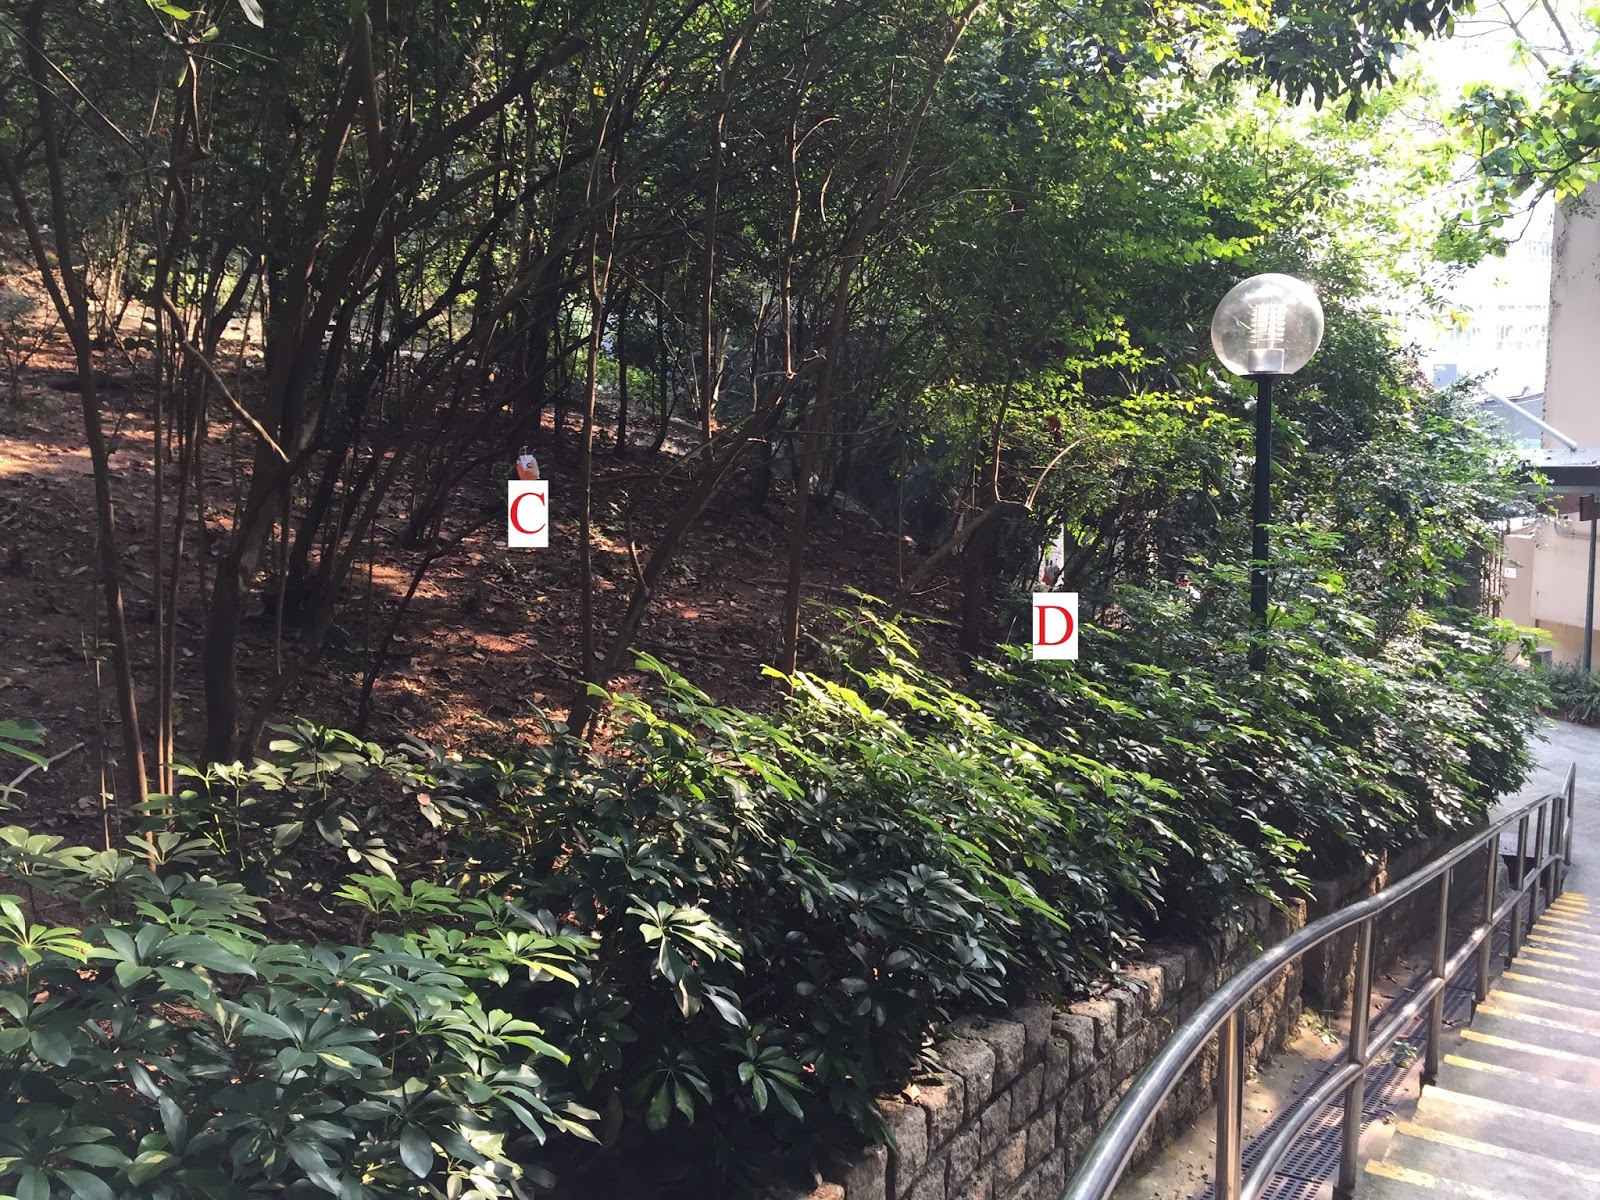
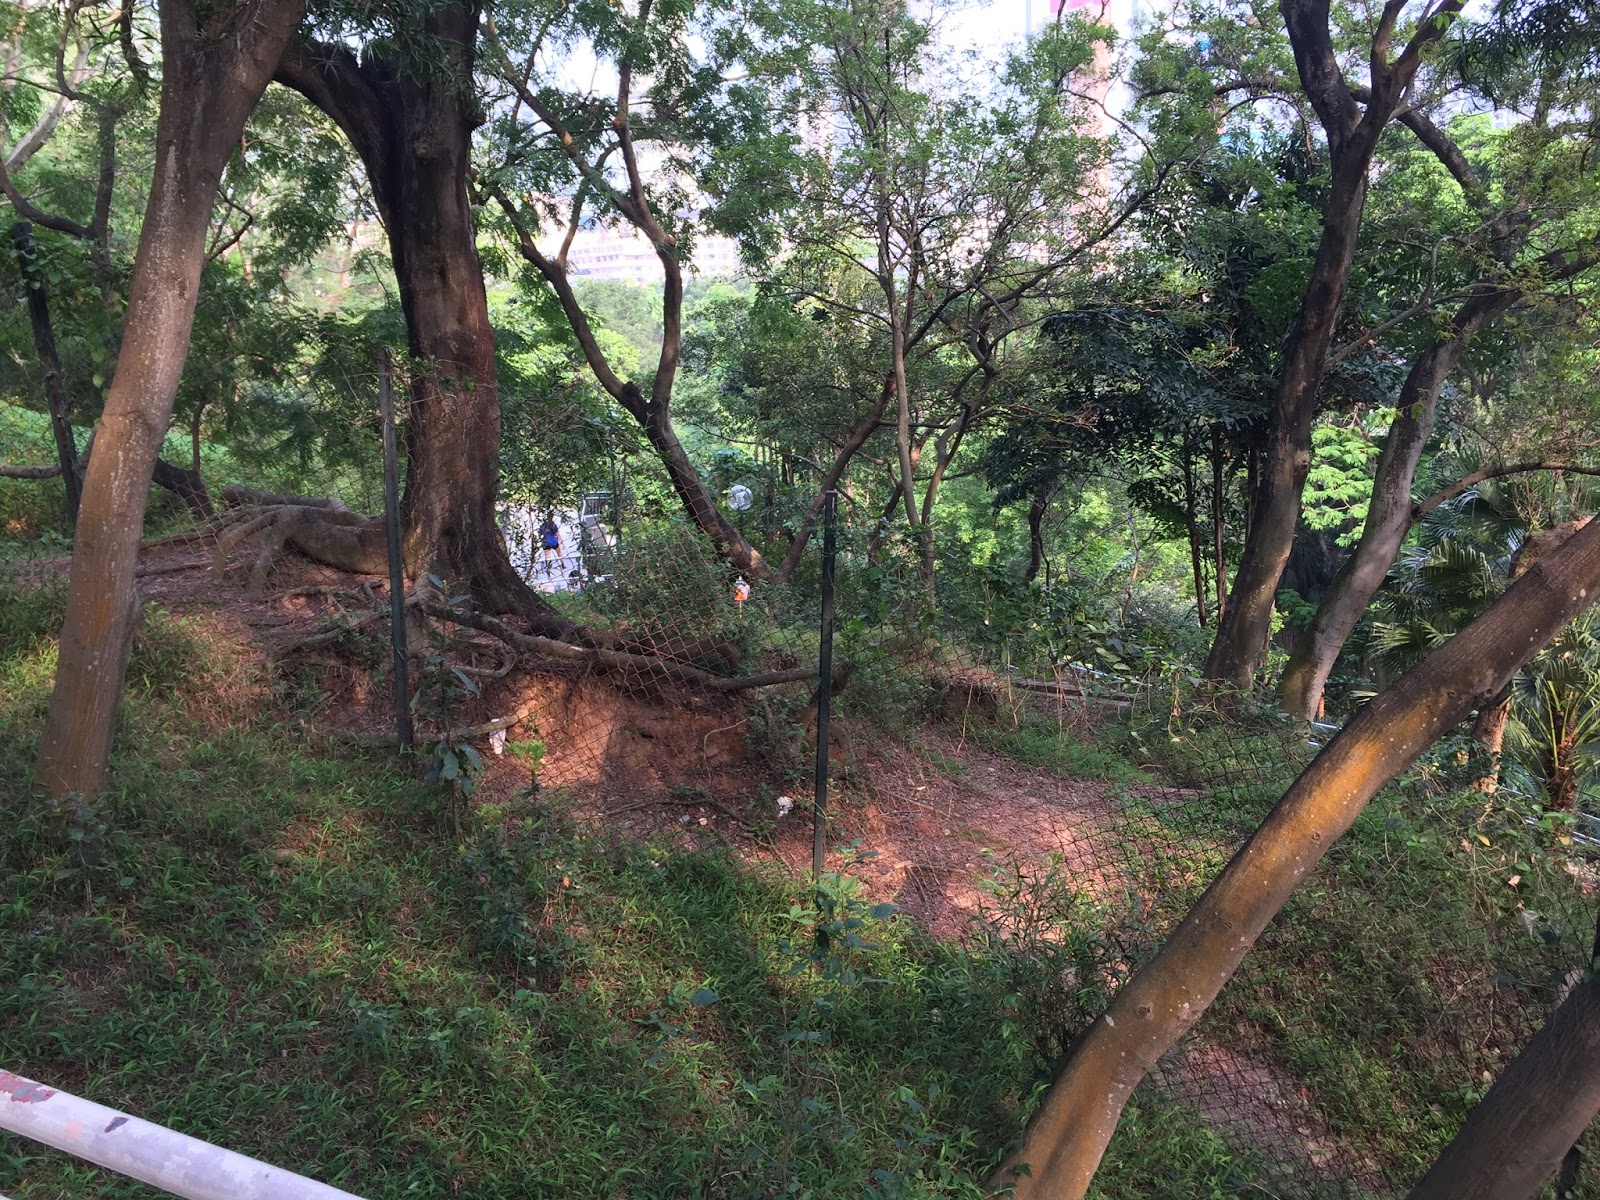
 |
| Blue arrows: photo taking locations and directions |
| Control #3: 4 controls, re-entrant |
| Control #4: 4 controls, spur |
Control #3 started to get difficult. This control tests the height judgement. The contour is the best hint. The key is to realize that the contour in the map extends to the opening of hedges next to the stairs. Thus, from the opening, if the flag can be seen horizontally, that flag is likely to be correct.
Control #4 was easier. It would be good to double check by walking down to the bottom of the stairs and seeing if the flag is next to the rock face. Then, return to the DP to answer the question. This brings to one of the most important points in this blog:
Control #5 -- Importance of Leaving the Decision Point (DP) to See in Different Angles
Do not stay at the DP to make all the decisions! The DP is only for identifying which flag is A and which flag is B. As long as the trails are not shown in the map to be forbidden to enter, competitors are allowed to walk anywhere on trails.

 |
| Blue arrow: photo taking location and direction |
| Control #5: 2 flags, trail, SW end |
From this angle, it is easy to see where the trail ends. Thus, answering this question can be done more confidently. When going back to the DP to answer the question, it is needed to remember which flag corresponds to which flag letter. In the above case, the two viewing angles were 180 degrees opposite to each other. Thus, when flags from left to right are ordered as A and B on one side, the order becomes B and A on the other side.
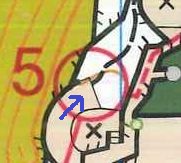
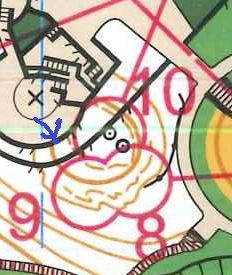
Control #6 -- Sighting Line Technique
There is only one flag for this control, so it is a true (A) or false (Z). The angle of the picture was chosen for readers to answer this question.
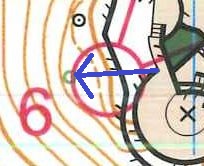 |
| Blue arrow: photo taking location and direction |
| Control #6: 1 control, re-entrant |
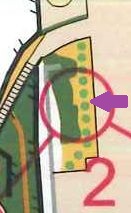
To decide whether the flag is at the correct location, the best way is probably using a sighting line: form a straight line between the distinct tree and the end of the fence (the blue arrow is larger for this reason). In the competition, you may use the straight lines marked on the compass to form this straight line. You should also see that the straight line is slightly off center of the red control circle to the north. Thus, if the flag is slightly on the left side of the sighting line from the viewing location, the flag is likely to be placed correctly (I got this question wrong because I did not know that the sighting line does not pass through the center).
There is still an issue: a smaller tree closer to the observer was not marked on the map. I actually wondered if this tree needs to be marked or not. This small tree seems to be quite distinct. With this tree marked on the map, the answer for this question would be pretty clear.
Control #7 -- Easy Control
Another true or false question. This one is pretty easy. It is easier to see the flag location if you get to the top. You may decide the answer of this question from this photo alone.
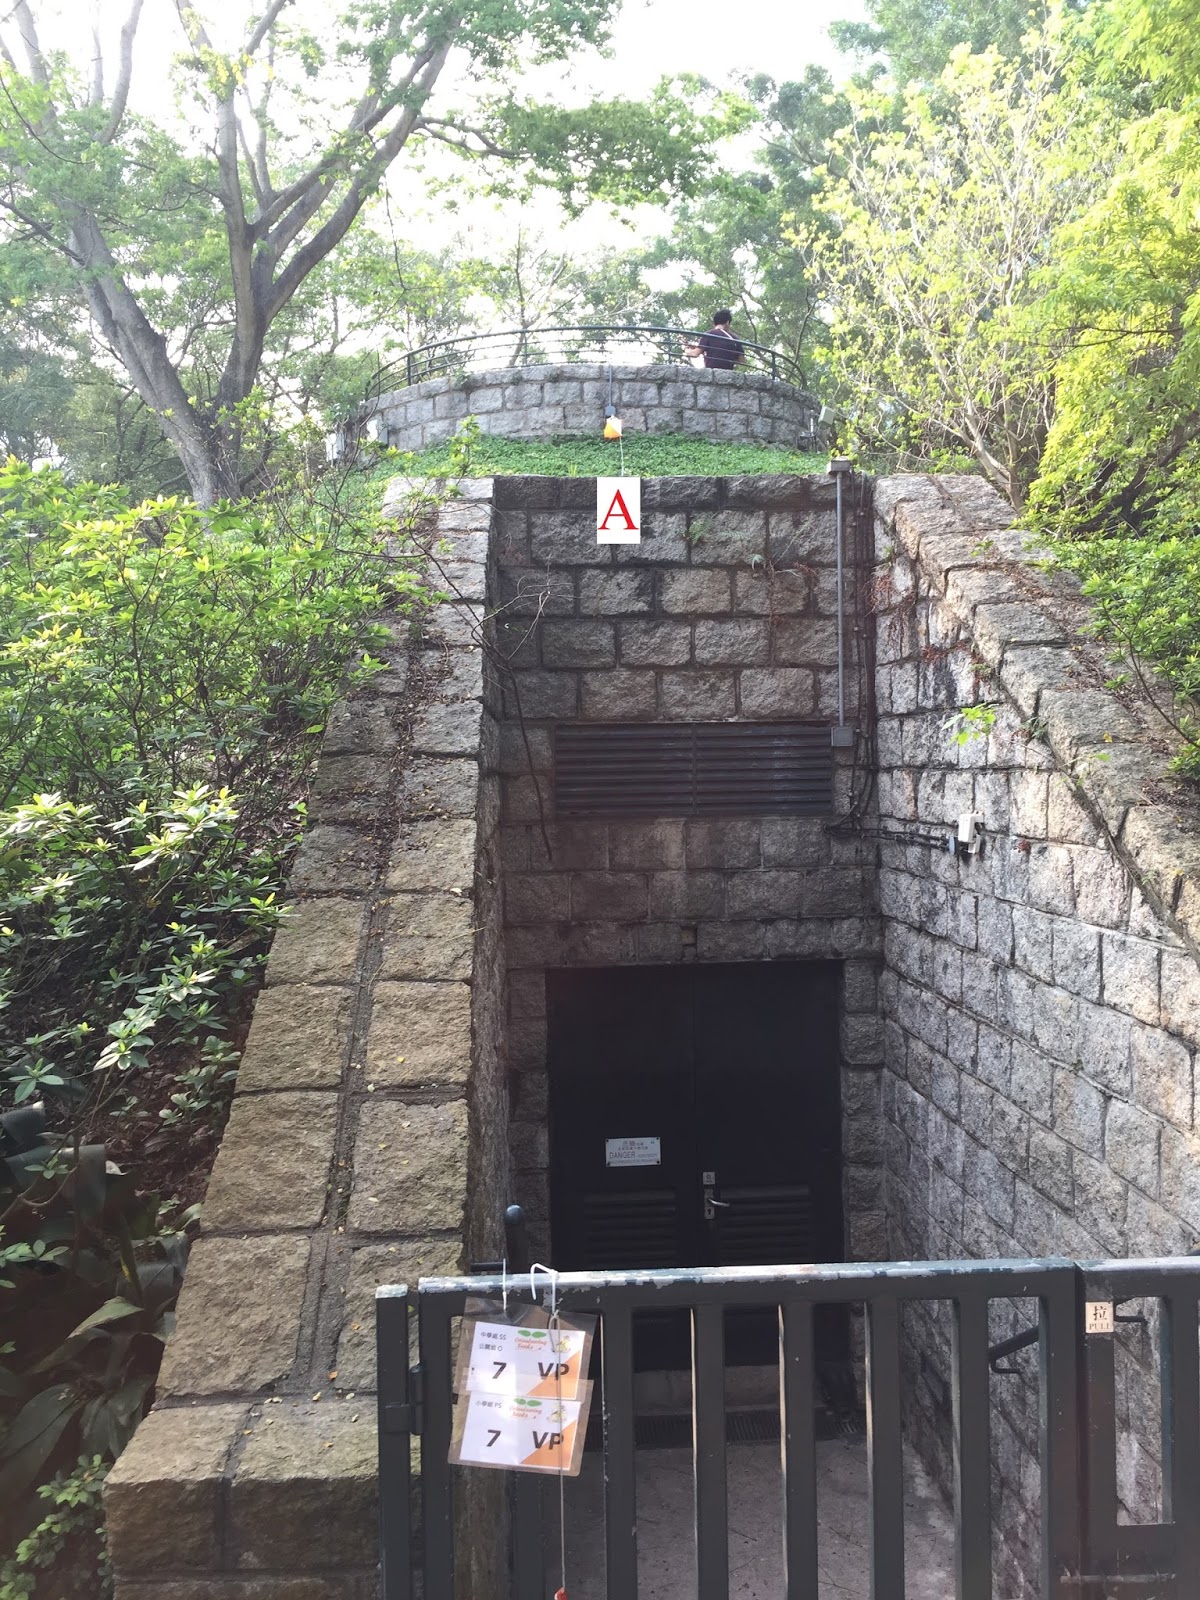
| Control #7: 1 control, between two stone walls |
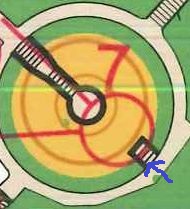
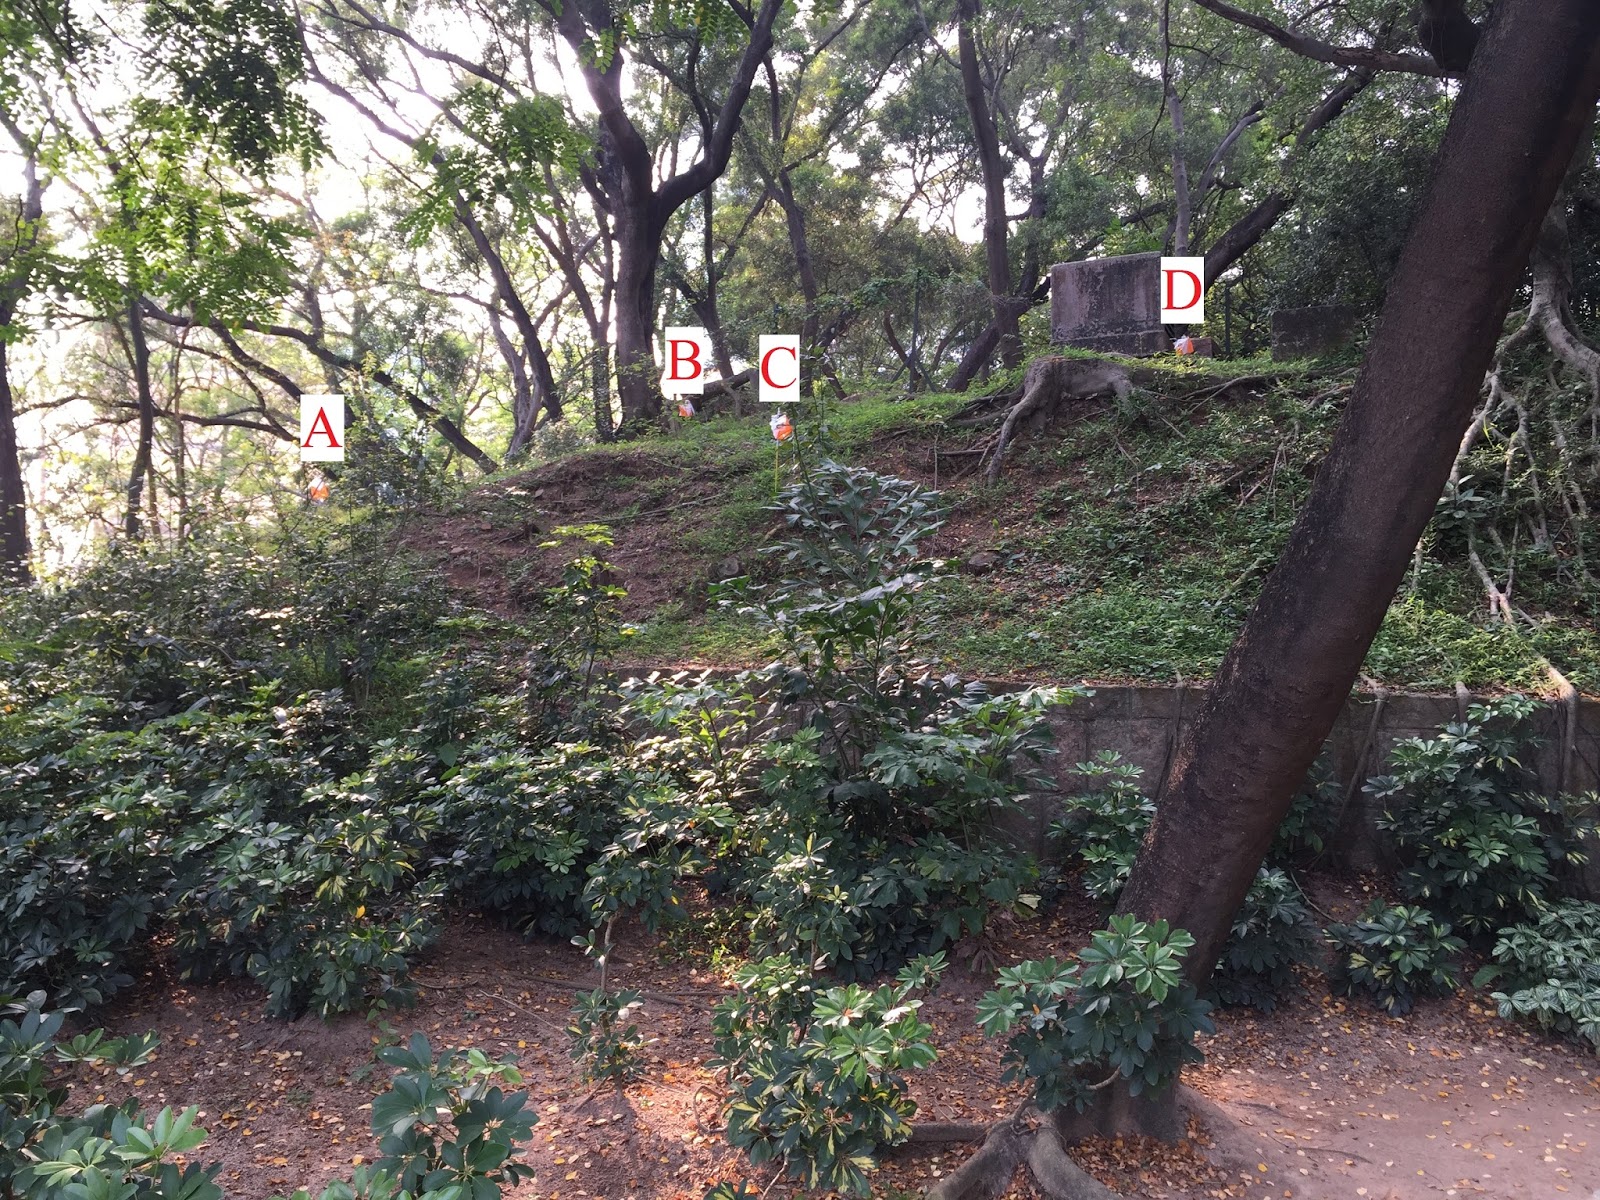
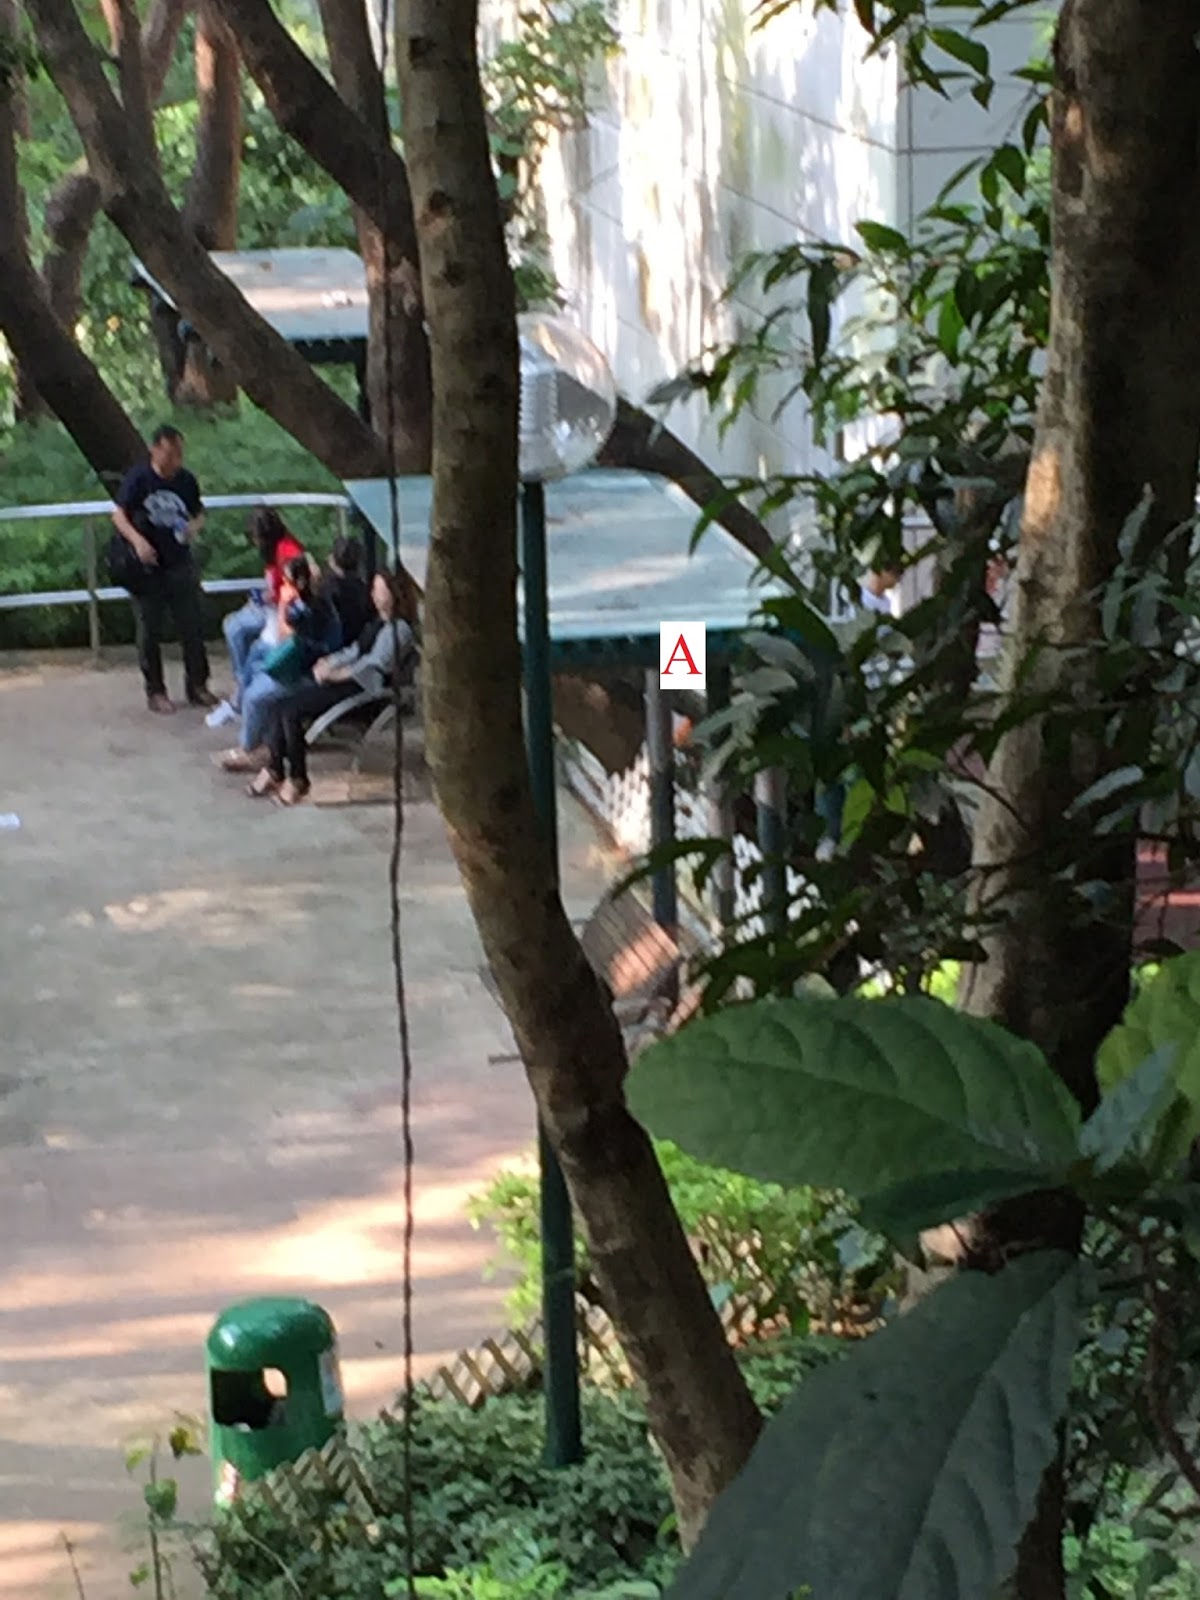
Control #8, #9, #10 -- Hidden Features
The most challenging problems are this Controls #8, #9, and #10 cluster. Remember that it is important to leave the DP to get different perspectives?
 |
| Blue arrow is close to where the DP is |
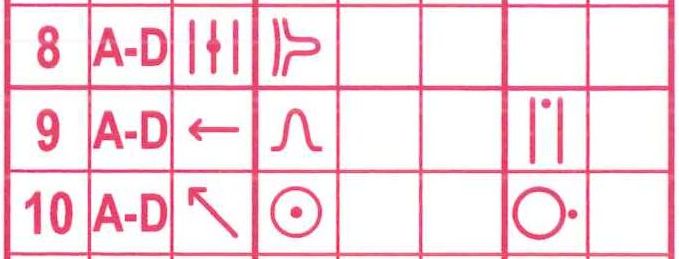 |
| Control #8: 4 flags, the middle spur Control #9: 4 flags, the west re-entrant, top Control: #10: 4 flags, the NW man-made stone (cairn), east side |

From the map, the spur is directly above the end of the stone wall. When walking closer to the stone wall, it would be easier to see if the flag is really placed like the map is described.
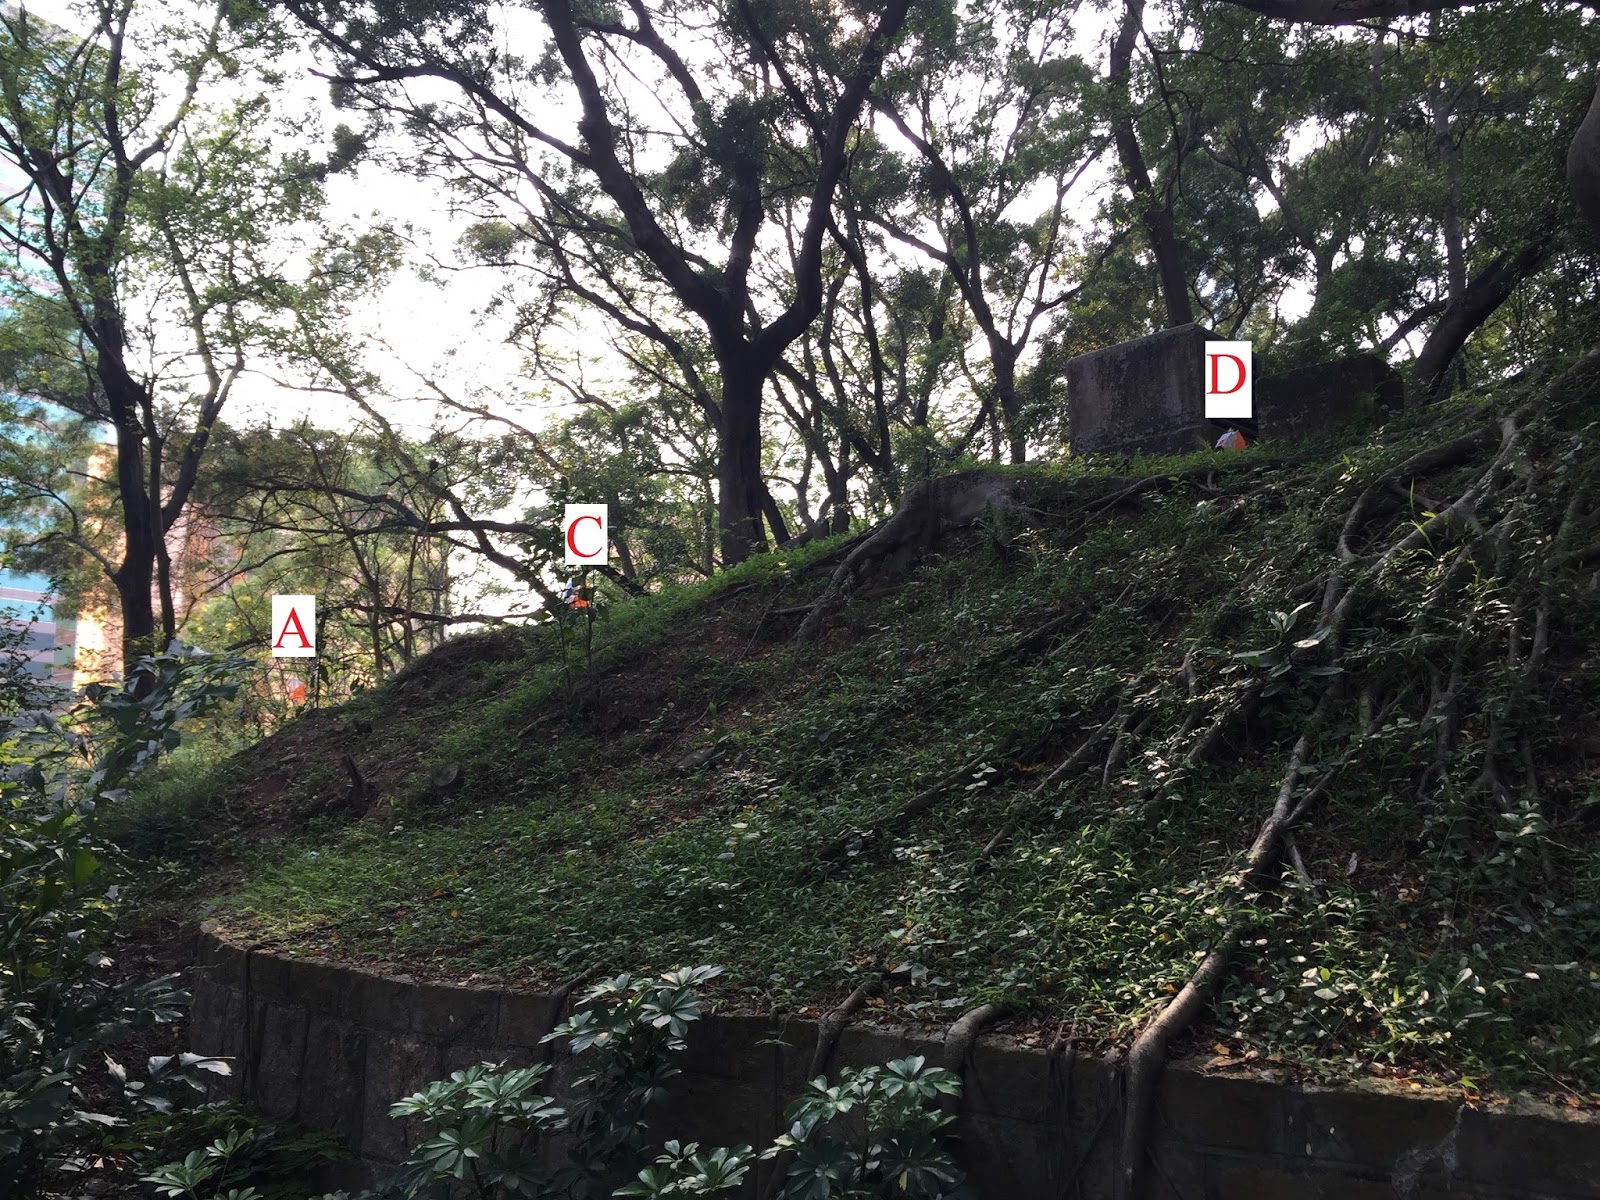
Then, we look at Control #10. It looks like Flag D is next to the man-made stone. However, there should be two stones, and the control should be the NW one (the inner one). To check the inner stone, one may walk to the location below:

Then, one can walk back to see which stone Flag D is at. It turns out that this cluster of controls does have "none of the above" (Z) answers.
Control #10 demonstrates the idea of "hidden features" -- control features that cannot be seen from the DP. In many cases, as long as one walks away from the DP, the hidden feature may become visible. Thus, answering these controls properly requires leaving the DP.
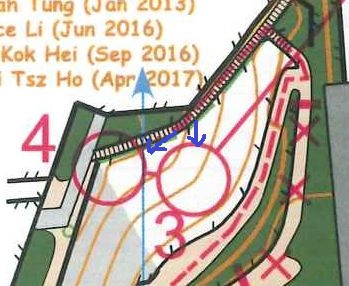
Finally on Control #9. Would Flag A be the correct location? It turns out that Flag A is incorrect (I got this wrong, too). This is a more difficult "hidden feature" problem. The re-entrant (small gully) is further west from Flag A and cannot be seen from the DP.
There is still hope to see the control feature in this case, but one needs to walk quite far away from the DP. See the photo and the map (with blue arrow) below:
One needs to walk all the way back to Control #6 to view from the top. From this point, the re-entrant may be easier to see, by looking at the two possible spurs (on the picture one quarter to the right, and about half between top and bottom). Then, one can decide that the re-entrant does not have a flag.
Control #11 -- Long Range Control
This control demonstrates a control where one is required to view far away. The following photo was taken at the blue arrow on the map, and was zoomed in. The photo was not taken exactly at the DP because it was a bit difficult to capture the flag and the surrounding environment.

| Control #11: 1 control, the north shelter, SE corner (outside) |
Timed Control
The timed control was originally supposed to be done between Controls #4 and #5. However, since 1) there was a long line, 2) there was only a time limit of 60 minutes, and 3) timed control is for demonstration only (not counted in the result), I was allowed to return to this to try for the timed control. In this timed control, there were 3 questions. The competitors needed to answer the questions correctly as fast as possible. In the real competition, the fastest person will win if there is a tie for the pre-O (given that all questions were answered correctly). Wrong answer will result a time penalty. There are no "none of the above" (Z) answers in timed control.
Below was the photo and the map (with 3 questions) for the timed control:

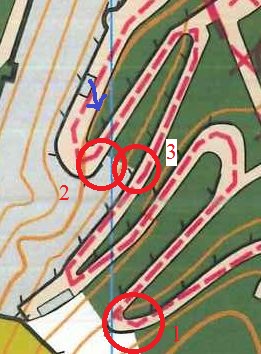 |
| Blue arrow shows the viewing location and direction. Red circles are the questions. In the competition, the viewing direction is always pointing upwards. |
I thought I could identify the trail bends quickly and correctly. In the end, however, I made one mistake for 3. Fortunately, this question was not counted in this event.
Post-event
When I returned and got the solution map, I found that I made so many mistakes (Controls #3, #6, #9, and 1 timed control). CH Ho, one of the most famous trail-O people in Hong Kong, discussed with me on some of my mistakes. I found that this discussion helped me to learn. Some of the strategies that I wrote above came from this discussion. In addition, Mr. Ho thought this event was quite challenging. For a seasoned trail-O competitor, this may be a fun event. However, I wondered if the first-timers can understand the expectation in this trail-O competition. Will they find this event, as a promotional event, too difficult?
Since this was a promotional event, I was allowed to return to the competition area to take photos of each control (hence the photos in this blog). On the way, I got a chance to talk to the course setter, including questioning about Control #3 (concerning contours). After this discussion, I learned the best way to solve this problem (as written above).
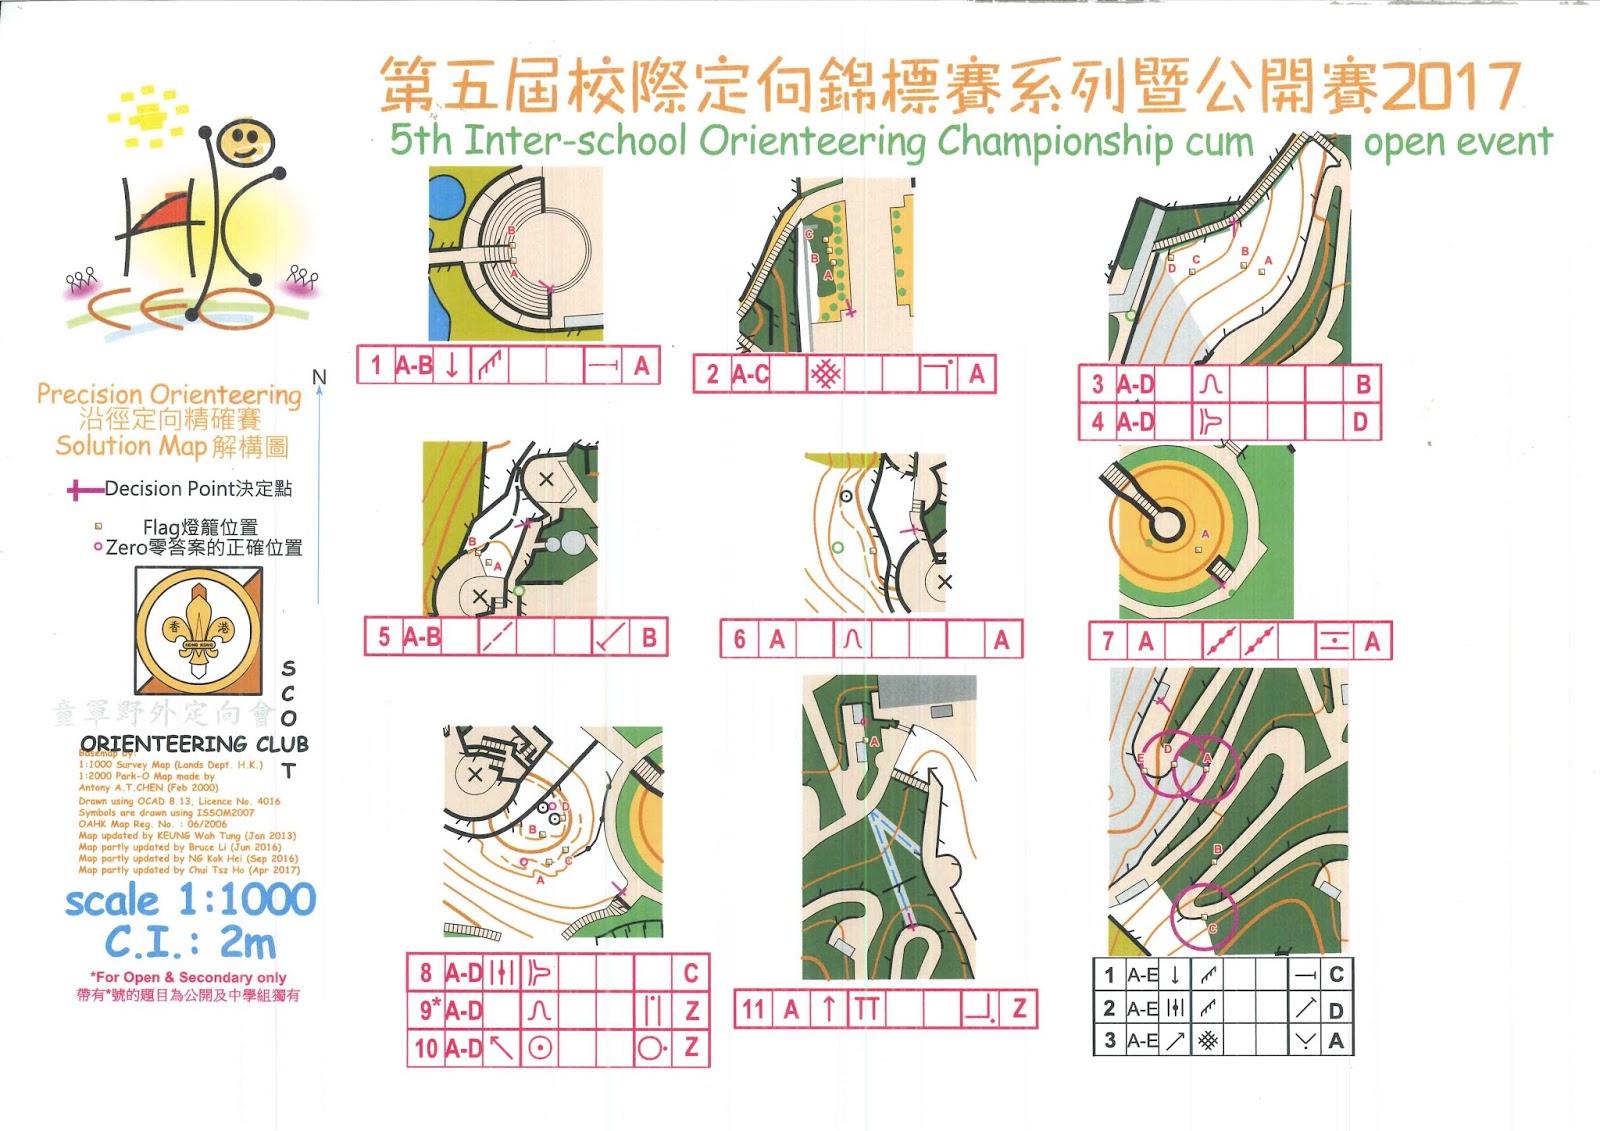
Below is the solution map for this trail-O event:
(P.S. I may later update this blog with more videos. If the videos are uploaded, I will announce it)
No comments:
Post a Comment